Sometimes I wish I could just wave a magic wand and make a space beautiful instantaneously. But then, there is such beauty in the details and in the way things come about and the places things come from and find their way to, that I wouldn't want to miss out on the laborious part where all that happens. There is God in the details! I believe that more and more as I do more and more projects and I'd like to share some of that with you.
THE DOOR
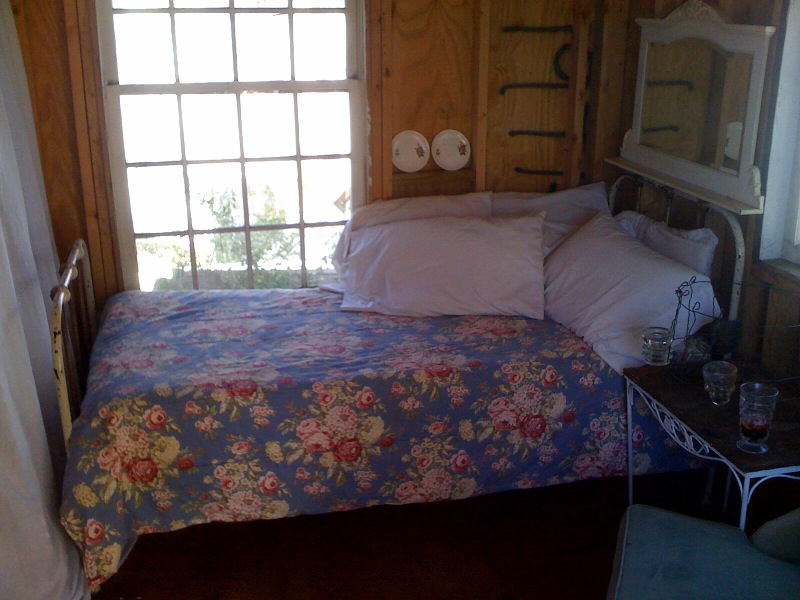
In this photo, you can see part of a very old door leaning against the stairs.
My ex-husband is the sort of man who doesn't relate to photographs or objects, who keeps all his memories in his head, and who can move in or out of a place with four boxes or less. Clearly, I was a shock and a challenge for him! Because his family's heirlooms are my daughter's heirlooms, and because he is not the type, I have become the keeper of his family's things.
This door came off of his grandmother's farmhouse in Wolf, Oklahoma. Really, Wolf, Oklahoma is an abandoned box car in a field with "Wolf, Oklahoma" painted on it and a few scattered houses. "Grandma Jude" (who's real name was Ida Burgess Harjo) lived out her years in one of the houses down the road from the box car. The house was built in the 1910's. She raised 9 children in a two bedroom house. My ex-husband's father, A.B. Harjo, was born in the house in 1919. He returned there during his retirement years and lived there until his death in 1999. I salvaged the door from the shed behind Grandma Jude's house years ago. Then, I am ashamed to admit, it sat in my side yard for several years until I began to fall apart. So I shoved it into MY shed. I've been trying to think of something to do with it for ages. Blessedly, I was able to put it back together and, finally, I found a place for it:
It makes a great, rustic backdrop for the crisp, white bed. And now I don't have to paint the walls like I'd planned!
Don't miss the wonderful chrystal door knob and the great rusty old latch!
To the right of the door, are two mirrors.
The top mirror was given to me by my dear friend, Sarah, who said it just "looked like me" and because she couldn't find the right place for it in her house. I didn't let that stop me from letting it linger in my garage for a couple of years when I couldn't find the right place for it in mine either! Finally, the right place came!
The lower mirror is a part one of my very favorite freesourcefull projects. I salvaged a vintage twin bed (headboard and footboard) from the curb in front of my friend Vickie's house. It had been her daughter's bed but it was worn out and broken. I cut the spindle sections out of each end, screwed some supports in between them, put an old enamel table top (also Grandma Jude's) on top, and made a coffee table out of it. Alas, no photo at the moment.
The scrap pieces that remained after this process were just too great to throw out. I took one of the bottom pieces with the legs on it, turned it upside down, screwed it together with the ornamental top portion from the headboard, and it became a frame. It used to have a print of a "yard long" painting of vintage roses in it. I'm not sure where that went. Hmmm... Anyway, I found an old door mirror in the upstairs of the shed that was missing it's cheap plastic frame and cut it down to fit into my freesourcefull frame.
I love getting to use BOTH of these mirrors and I love that they're even better TOGETHER! As an added bonus, they reflect, and therefore extend, the rustic, chippy texture of the door to really tie that whole corner together. That makes one more wall that doesn't need paint right away!
THE SIDE TABLE
The little white wrough iron side table started out as a rusted patio side table. I found it in a curb-side junk pile in Enid. A quick coat of white spray paint brought it back to life. I cut a piece of plywood for the top but had never decided what to do with it after that -- fabric? mosaic? a vintage tray? So it waited. Because I knew something would come along -- something ALWAYS comes along. Eventually. I put the table in the shed because it was just the right size for the spot between the bed and the chair. But it needed a top. For some reason, I wandered into the side yard on the other side of the house and came across the bottom of an old guinea pig cage. It was green. And it works perfectly -- until I find something else I like better!
STORAGE
There are lots of plastic bins stored in the shed -- under the stairs and on shelves behind the stairs. I have a bin for each departed (and some not departed) relative whose stuff I ended up with and want to keep. These bins are wonderful time capsules. Instead of mixing these items in with my stuff and then forgetting where they came from or the girls' never knowing where they came from, I can open a bin and VOILA! It's like a box full of the essence of that person. I recommend this method -- especially for the stuff that is SO that person but not SO you/me! The bin-storage space, once curtained off, also became the perfect spot to stash the blue kitchen farm table (with legs removed).

It kinda drives me nuts that there are a couple of cardboard boxes mixed in there with the matching bins but, alas, I am too cheap to go buy more bins. I am hoping that some will become available as I clear out other stuff elsewhere (because I have LOTS of these matching bins). The photo of the under-the-stairs storage didn't take so you'll just have to imagine matching stacked bin bliss!
And here is a shot of how all the junk magically disappears behind the pretty white curtain:
And here is a shot of the stairs. Because I LOVE the stairs! And also because you can see the storage under them and the storage bench in front of them.
The bench used to be in my bathroom for towel storage for years and years until I found the white dresser that replaced it. It's been an orphan ever since. I think it likes this new home I've found for it. My little tiny shed room can now seat six! Gonna have to plan a tea party!
THE METAL CABINET
I have wrested in my mind extensively over the metal storage cabinet (and the other two of the trio that are in the garage) -- to get rid of them (because they're ugly and don't seem to function well for my purposes) or keep them (because they could be painted, because they're storage, and because I would have to be crazy to throw out three matching cabinets?). There were office storage cabinets that my mother and step-father ordered through his office supply business for the garage in our house in Enid when I was in high school. So, they've been in the family for 30+ years. There is literally 25 year old paint stored in them. I know this because I didn't buy it so Mother must have. She's been gone for 22 years -- thus dating the paint. I will clean it out later. It will become my out-of-use-housewares storage cabinet. I was SO blessed that the clothing rack slipcover I have fit over the metal cabinet! It fit almost TOO perfectly! Sara-Grace, as she was helping me button it, said, "It's like buttoning a shirt on a fat man!" She is SO RIGHT! Ha! Maybe I should cut a hole for the handle (which would help a little around the middle there)?

On top are three extra pillows (that I needed to store anyway) and two EMPTY vintage suitcases (this photo only shows one). Now I'll have to find something to store in the suitcases. I suspect that won't be a problem.
THE DISPLAY SHELF
I love shelves. Shelves mean you get to have more fun junk! AND you get to SEE IT all well-displayed and beautiful! One of my favorite display devices is to run a shelf up near the ceiling. It adds storage AND visual interest. Here are several photos of the shelf in the shed.
I love the old enamel pot lids, the white bathroom heater grill, and the old, black stove burner cover thingy! All were free. The bowls and planters were $2 or less. I can never have enough white ceramics. I use them EVERYWHERE and I never get tired of them!
THE CANDLE-LIER!
I have always loved the old glass insulator caps from electrical lines of the past. My mother had one that sat on the kitchen window sill for years because we just liked looking at it, I think. But I never knew what to do with them (and I guess Mother didn't either!) until I saw the original of this candle-lier -- probably made by the Junk Market Style ladies.
So, of course, I copied! I love it but have never figured out where to hang it -- until now. You've heard a lot of that theme from me lately, haven't you? My Runaway Room has become such a wonderful place for so many of my homeless treasures to put down roots! It's like they were all waiting for me to figure it out. LOVE THAT!
Time for me to go paint some stuff and put away some of the junk that I threw out of the shed! Bye!